
I wanted to start a separate thread for my first Polymer 80 build. I say first because before I'd even started, I'd ordered multiple colors of frames. Thinking that I'd want to make one of them all. I was a little skeptical going in, but like a lot of folks, I'd seen a gazillion YouTube videos and figured "Hell, if they can do it, I can do it". Right?
![Image]()
![Image]()
![Image]()
![Image]()
To do the milling I used a dremel, hand files, a drill, and sand paper. The drill was used ONLY to drill the pin holes. I never even opened the milling bit. I don't have a drill press so it wouldn't have helped me much. I first started to take down the tabs with a file, this was taking a bit too long so I broke out the dremel. Within 5 minutes, all 4 of the top tabs were down, close to the frame. Then I finished those off with files and sand paper. Also, I'd read and heard about people using 2000 grit with WD-40, so I finished off the tops with that as well. The top portion was ridiculously easy to be honest.
The barrel seat portion, or whatever that's officially called, was a little trickier. My dremel didn't have a long enough post to get it in there without risking damaging the sides so I busted out my pocket knife and seriously just cut it out, scraping it into a rough U shape. Then I wrapped a punch in sand paper and went to town. That took the longest by far. Not a whole lot of room to maneuver using what I had, so I had to just take my time. All in all, the first round (yes there was more than one round) took legitimately about an hour of actual work time. I'm not counting the time I had to spend looking for tools that my daughters have borrowed and didn't put back in their place, as well as the cussing involved.
So I get it done that night, install the upper parts kit into the Shadow Systems slide, install the Faxon barrel, and then start working on the lower parts. Now I've never done this, however I have assembled many AR's and felt comfortable installing a lower parts kit. Most of the parts went in without issue, EXCEPT the rear rails. For the life of me, I couldn't get the rear rails to line up perfectly. It just seemed like on the right side of the frame, it was off, ever so slightly. I WAS able to get all of the pins in, with a little help from one of the aforementioned daughters (who's going to start her build next). I have a G23 and G19, so I knew that if I had any questions on where things go, or how they go, I had google, youtube, and my "REAL" Glocks on the table.
Once I got all the pins and the rest of the kit installed, I dropped the slide on and started to cycle the slide. Here's where I ran into issues. So first, it just seemed to drag quite a bit in the front, felt like guide rod and spring, so I took it apart, sanded it down a bit more, and put it back together, NEXT it wouldn't reset the trigger. I remembered seeing a YouTube video of a guy that had the same problem, and the fix he applied. So I took the lower apart again, and applied that fix. I'll post a link to that video here too.Since I had it all apart, I put the rear and front rails onto a diamond stone to sand down any high spots, saw that on a video too, I'll look for the link.
Oiled everything back up and put it all back together. Trigger reset issue fixed! But it was still dragging. It would cycle about 90% of the time just fine, but if I "rode" the slide forward, or cycled very slow, it would get caught. I took it apart again and noticed small burs, or material in the guide-rod/spring area. Not only that, but there were a couple times that the take down lever got stuck and once even fell out! At first I thought that I just didn't do a perfect job milling that area, so I sanded some more. While I was sanding, I went back to youtube/google.
Found a video from a guy having the same problems, turns out, his take down lever spring wasn't flush enough and was causing the guide rod and spring to drag on it, even getting caught and causing his take down lever to fall out! Voila! Watched THAT video, adjusted the spring and installation and BAM! Problems fixed. I put it all back together, cleaned everything up and then proceeded to cycle it about 1 gazillion times. Then I loaded a magazine with snap caps and ran through cycling, reloading etc to TRY to get it to jam. So far nothing.
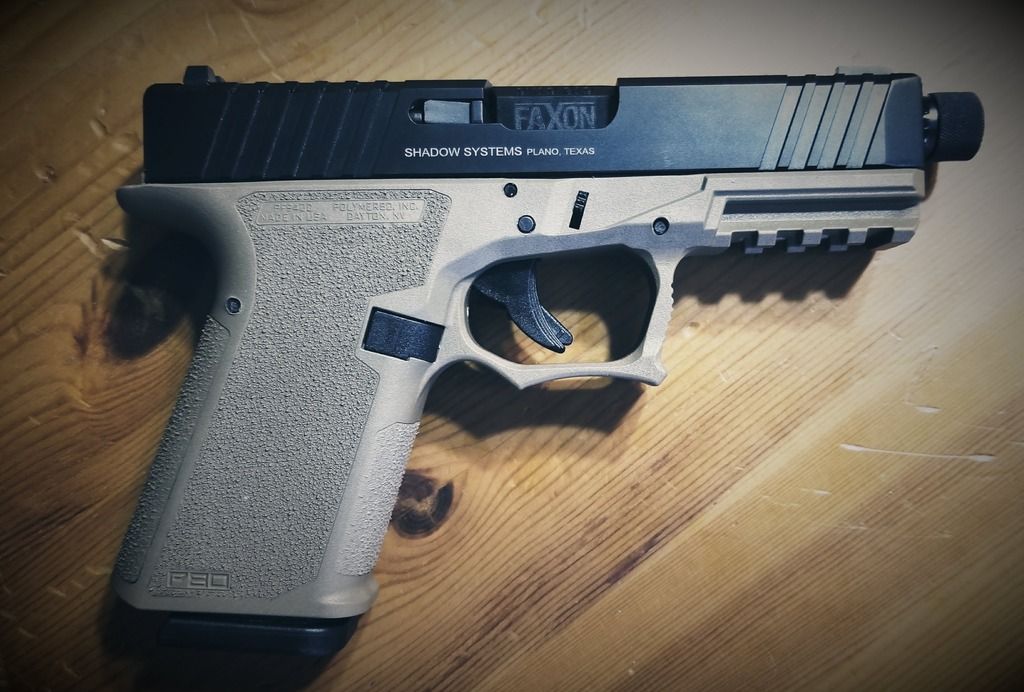
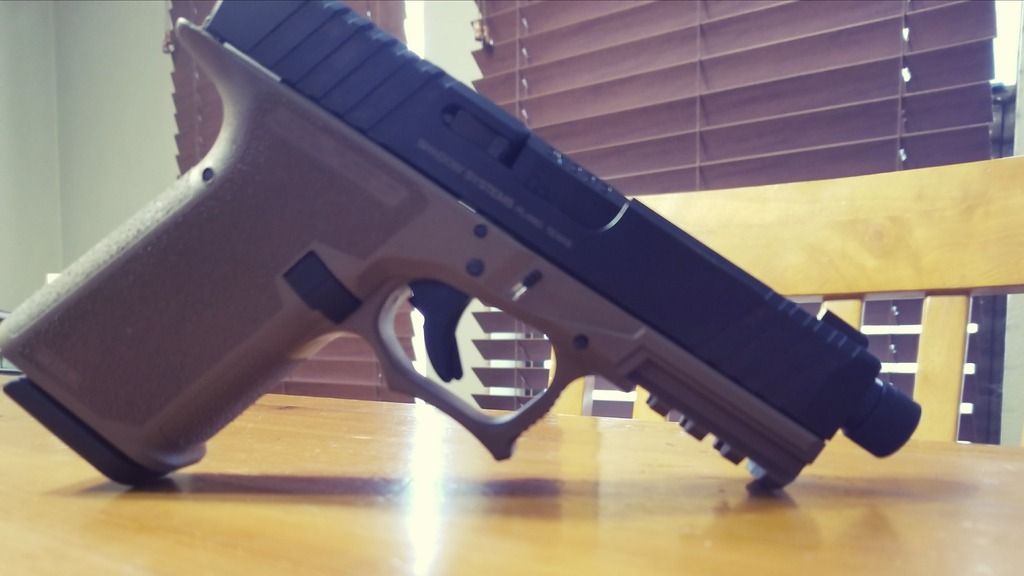
I have this Friday off and will be taking her to the range to run some rounds through her. I'm pretty confident that she'll run smooth but this will be the first test. I'll post links to the vids in casesomeone else has the same issues. Overall, I'm much more confident and ready to start the next build. My REAL Glock is still my EDC, but making these is fun and so far rewarding. Here's the parts list for the first build:
Frame - Polymer 80 / Coyote Brown Brownells exclusive
Lower Parts Kit - Brownells
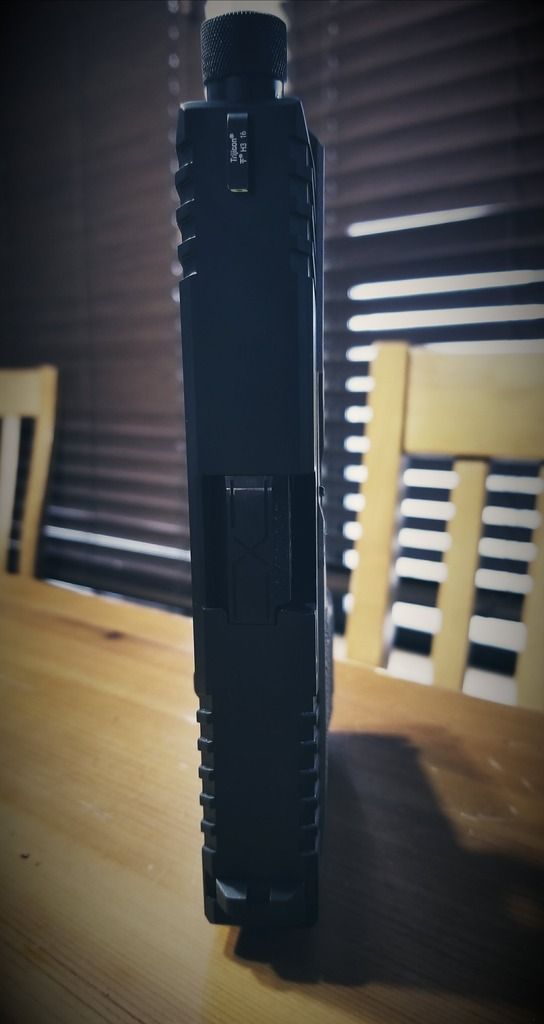
Barrel - Faxon Arms, flame fluted and threaded
Sights - Ameriglo Spaulding
Slide - Shadow Systems G19 Carry Slide
Upper Parts Kit - Brownells
Youtube on sanding rails
Takedown lever and spring drag issue
Trigger reset issue
Range test on 12/22/2017 - 350 rounds. 2 FTE's. Not too worries about that as some of the ammo was 4 years old and pretty crusty, plus we're talking a brand new barrel and slide. Will be running again this weekend (01/13/208) and will post results
PS. A couple quick notes. The EXTENDED mag release that comes in the kit is way too large for these frames (IMO). I swapped the oem mag release from my G23 to the Polymer80 frame and then put that one on the G23. Perfect fit both ways for me.
PSS. I don't have a suppressor, I bought a threaded barrel, simply for looks and MAYBE, I'll look at a suppressor or a comp for fun later down the road. Figured since I was going for a "custom" type build, I'd make it fun. In hindsight, the threaded barrel is cool and all, but I need to figure out how to get the thread protector to stay on. Seems after cycling, it works itself loose. I'm sure there is some type of o-ring that I don't have yet, or need, etc. Any suggestions welcome.

To do the milling I used a dremel, hand files, a drill, and sand paper. The drill was used ONLY to drill the pin holes. I never even opened the milling bit. I don't have a drill press so it wouldn't have helped me much. I first started to take down the tabs with a file, this was taking a bit too long so I broke out the dremel. Within 5 minutes, all 4 of the top tabs were down, close to the frame. Then I finished those off with files and sand paper. Also, I'd read and heard about people using 2000 grit with WD-40, so I finished off the tops with that as well. The top portion was ridiculously easy to be honest.
The barrel seat portion, or whatever that's officially called, was a little trickier. My dremel didn't have a long enough post to get it in there without risking damaging the sides so I busted out my pocket knife and seriously just cut it out, scraping it into a rough U shape. Then I wrapped a punch in sand paper and went to town. That took the longest by far. Not a whole lot of room to maneuver using what I had, so I had to just take my time. All in all, the first round (yes there was more than one round) took legitimately about an hour of actual work time. I'm not counting the time I had to spend looking for tools that my daughters have borrowed and didn't put back in their place, as well as the cussing involved.
So I get it done that night, install the upper parts kit into the Shadow Systems slide, install the Faxon barrel, and then start working on the lower parts. Now I've never done this, however I have assembled many AR's and felt comfortable installing a lower parts kit. Most of the parts went in without issue, EXCEPT the rear rails. For the life of me, I couldn't get the rear rails to line up perfectly. It just seemed like on the right side of the frame, it was off, ever so slightly. I WAS able to get all of the pins in, with a little help from one of the aforementioned daughters (who's going to start her build next). I have a G23 and G19, so I knew that if I had any questions on where things go, or how they go, I had google, youtube, and my "REAL" Glocks on the table.
Once I got all the pins and the rest of the kit installed, I dropped the slide on and started to cycle the slide. Here's where I ran into issues. So first, it just seemed to drag quite a bit in the front, felt like guide rod and spring, so I took it apart, sanded it down a bit more, and put it back together, NEXT it wouldn't reset the trigger. I remembered seeing a YouTube video of a guy that had the same problem, and the fix he applied. So I took the lower apart again, and applied that fix. I'll post a link to that video here too.Since I had it all apart, I put the rear and front rails onto a diamond stone to sand down any high spots, saw that on a video too, I'll look for the link.
Oiled everything back up and put it all back together. Trigger reset issue fixed! But it was still dragging. It would cycle about 90% of the time just fine, but if I "rode" the slide forward, or cycled very slow, it would get caught. I took it apart again and noticed small burs, or material in the guide-rod/spring area. Not only that, but there were a couple times that the take down lever got stuck and once even fell out! At first I thought that I just didn't do a perfect job milling that area, so I sanded some more. While I was sanding, I went back to youtube/google.
Found a video from a guy having the same problems, turns out, his take down lever spring wasn't flush enough and was causing the guide rod and spring to drag on it, even getting caught and causing his take down lever to fall out! Voila! Watched THAT video, adjusted the spring and installation and BAM! Problems fixed. I put it all back together, cleaned everything up and then proceeded to cycle it about 1 gazillion times. Then I loaded a magazine with snap caps and ran through cycling, reloading etc to TRY to get it to jam. So far nothing.
I have this Friday off and will be taking her to the range to run some rounds through her. I'm pretty confident that she'll run smooth but this will be the first test. I'll post links to the vids in casesomeone else has the same issues. Overall, I'm much more confident and ready to start the next build. My REAL Glock is still my EDC, but making these is fun and so far rewarding. Here's the parts list for the first build:
Frame - Polymer 80 / Coyote Brown Brownells exclusive
Lower Parts Kit - Brownells
Barrel - Faxon Arms, flame fluted and threaded
Sights - Ameriglo Spaulding
Slide - Shadow Systems G19 Carry Slide
Upper Parts Kit - Brownells
Youtube on sanding rails
Takedown lever and spring drag issue
Trigger reset issue
Range test on 12/22/2017 - 350 rounds. 2 FTE's. Not too worries about that as some of the ammo was 4 years old and pretty crusty, plus we're talking a brand new barrel and slide. Will be running again this weekend (01/13/208) and will post results
PS. A couple quick notes. The EXTENDED mag release that comes in the kit is way too large for these frames (IMO). I swapped the oem mag release from my G23 to the Polymer80 frame and then put that one on the G23. Perfect fit both ways for me.
PSS. I don't have a suppressor, I bought a threaded barrel, simply for looks and MAYBE, I'll look at a suppressor or a comp for fun later down the road. Figured since I was going for a "custom" type build, I'd make it fun. In hindsight, the threaded barrel is cool and all, but I need to figure out how to get the thread protector to stay on. Seems after cycling, it works itself loose. I'm sure there is some type of o-ring that I don't have yet, or need, etc. Any suggestions welcome.

")