Glock Talk banner
  • Notice image

    Glocktalk is a forum community dedicated to Glock enthusiasts. Come join the discussion about Glock pistols and rifles, optics, hunting, gunsmithing, styles, reviews, accessories, and more!

"Alex Alex" Glock 44 15-Round Magazine

1 reading
42K views 222 replies 24 participants last post by  joseandrescruz7928  
#1 · (Edited)

"Alex Alex" Glock 44 15-Round Magazine
Image

Preface

This is a DIY project to convert an OEM Glock 44 10-round magazine to 15 rounds. The conversion may be simplified using 3D-printed and other replacement parts.

Background

This 15-round Glock 44 magazine (pictured at the top of this thread) was based on a concept developed by Alex Alex (AA),

Load Assist Tabs

You must start by removing the load assist tabs. You can separate them by getting up under one tab using a standard screwdriver and gently prying them apart. The load assist tabs won't be permanently damaged in the process.

Cut-Down Follower


You get +2 rounds by cutting down the follower ...

Image

(Left: Cut-Down OEM Follower; Right: Original OEM Follower; Both with OEM Spring)​

Here's a simple jig to cut the follower,

Image

Note
:
The screws hold the follower such that the cut is perpendicular to the edge of the jig.

A short length of 1/8" flat aluminum bar serves as a guide in cutting a new slot on both sides of the follower to hold the spring,

Image

New notches are cut by hand using an X-Acto knife and the edges are rounded using a file,
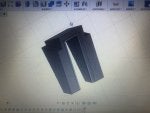
Image

Magazine Extension

The "Alex Alex" Glock 44 15-round magazine leverages an OEM Glock +2 magazine extension (SP07151) and, optionally, an OEM Glock magazine extension insert (SP07165).

Image

Alternatively, you can use a $3 Chinese knock-off (AliExpress / Magorui) +2 magazine extension and insert. You can also purchase the insert on eBay for $2 (seller lxranes9).

The notches of both the OEM Glock +2 magazine extension and the AliExpress / Magorui +2 magazine extension don't completely slip over the tabs on either side of the Glock 44 magazine. You should widen the notches by a millimeter or so to ensure the magazine extension locks in place (kudos to ViperR),

Image

Note
:
You don't use the flat insert that comes with the OEM Glock 44 magazine.

You get +3 rounds by incorporating +2 magazine extension. The extension must be "padded" (made more narrow) to keep the spring from twisting / contorting. There are three approaches to padding the magazine extension ...

Approach #1
In his video, AA directly padded the +2 magazine extension using a hot glue gun.

Approach #2
The author opted to pad the magazine extension insert (OEM SP07165, AliExpress / Magorui knock-off or eBay 3D-printed insert). The insert must first be cut down (remove the portion of the insert highlighted in gray),

Image

Pack the the cut-down insert with epoxy putty (e.g., J-B-Weld PlasticWeld Epoxy Putty), then press the insert into (and remove the insert from) the magazine extension. This ensures the diagonal slots on either side of the insert are clear of epoxy putty that may have "seeped" through. Allow the epoxy putty to dry. A slot is then drilled out using a drill press and a 1/4" drill bit. A metal file is used to square all four sides. A palm sander gives the padded insert a more finished look. And finally, a splash of flat black spray paint.

Image

Here's a picture of padded inserts in the +2 magazine extensions,

Image

Note
:
Some of these +2 magazine extensions and inserts were OEM. Some were AliExpress / Magorui knock-offs. They are indistinguishable. The more square inserts are from eBay. All of the inserts were fashioned by hand and hence the slight variations.

This approach was intended to serve as a prototype for a 3D-printed padded insert.

Approach #3
Alex Alex has developed a 3D-printed custom insert that can be found on Thingiverse,

Image

A number of community members have observed that the spring tends to catch on the cutouts of the Alex Alex 3D-printed insert. This is especially true of the lighter-gauge Walther spring (refer to Spring below).

A few observations from G8V8 ...

With Approach #2, the floor of the insert would normally add thickness to the magazine extension. Drilling out the floor frees up this space. With all three approaches, the spring sits directly on the floor of the magazine extension allowing for the spring to be less compressed. This added space is beneficial in inserting a fully-loaded 15-round magazine into the Glock 44 frame with the slide closed. The added room allows the top round to compress.
Replacement Spring

With the cut-down follower and +2 magazine extension, you need a longer spring to ensure the slide locks back following the last round. There are two options. One option is to stretch the OEM spring. However, there is a concern that the OEM spring will return to its original length after repeated use. The other option involves using a replacement spring.

Several community members are trialing the Walther PPQ 22 15+1 Replacement Magazine Spring from Taylor Tactical Supply,

Image

(Walther PPQ 22 15+1 Magazine Spring)

Refer to Replacement Springs for more information.

Here's a picture of cut-down followers paired with the Walther 15+1 spring,

Image

Conclusions

We are awaiting more range time in order to draw any final conclusions, however, the "Alex Alex" Glock 44 15-round magazine has shown tremendous promise in preliminary testing.

 
#9 ·
The only bad thing?

I'd prefer not to debate the relative merits of the G44 in this thread, however, ... the G44 is first and foremost a G19 trainer. If you're looking for the cheapest or most reliable .22 LR pistol in the world, look elsewhere. The G44 design and performance were constrained by the G19 form factor.

Having said that, I can't fathom why Glock would develop a G19 trainer with a 10-round magazine. I also can't fathom why Glock would develop a G19 trainer that can't be set up exactly like a G19. First and foremost, you should be able to mill (no MOS) a G19 trainer slide to accept an RMR ... preferably, rear iron sight forward. This ain't gonna happen with the G44 hybrid steel-plastic slide. However, just like the need for a 15-round magazine, I guarantee this problem is going to be solved in the coming days or weeks.
 
#8 · (Edited)
Alex Alex,

You deserve 100% of the credit. Thank you for sharing.

ETA: If you haven't inferred it from his YouTube videos, Alex Alex is based out of France where it's far more difficult to obtain Glock magazine parts. He's having to order the parts out of China. Of course, this is resulting in long wait times. Even in the U.S., wait times are over one month for the same parts. Please show some love for this Frenchman's willingness to share his "invention" with the worldwide Glock community.

Vive la liberté!
 
#11 · (Edited)
NICE!!!!!!!

What I would really like to see is a quad stack magazine like the Kel-Tec CP33 magazines. The CP33 mags definitely work. I measured the widest part (back) of my CP33 and G44 magazines. The G44 magazine is 0.902" wide while the CP33 magazine is 0.938" wide (1/32" difference). A 20-25 round quad stack would probably fit in the stock G44 mag body.
(additional thoughts below)
 
#12 ·
I've had the exact same wet dream! However, to be honest, I'm more than content with 15 rounds. I have a lot of silly G19 magazines (e.g., PMAG 27-round GL9). I just want a G19 trainer with 15 rounds. Of course, I'd prefer a base plate that was flush with the magazine, but I'll have to settle for the OEM Glock +2 magazine extension for the time being. Having said that, I think I'll order a few Kel-Tec CP33 magazines. If I can wedge a CP33 into a G44 magazine, that'll give me a 15-round magazine with a flush base plate. Damn you! ;)

Image
The trick would be getting the center divider and follower setup in the G44 mag body. I personally don't want to tear up a $50 CP33 mag myself. The CP 33 mags do work wonderfully. The only downside is that you must make sure that they are loaded correctly to prevent rim lock and jams.
 
#16 ·
I'm always fascinated by how much emphasis is put on capacity, and how little emphasis is put on actually hitting your intended target with repeatable precision.

I imagine if we're one day invaded by little green aliens that are only 4" tall who are knocked over easily with a .22, capacity might prove to be beneficial:

Image


...but otherwise I'm fine with 10 rounds in a .22 handgun. And if for some reason I wanted to tire my trigger finger out quicker I could always grab the Charger clone and install a fully loaded 25 round mag or larger capacity drum in it. I'm probably in the minority with this line of thinking, but I'm the only one that matters to me, LOL.
 
#55 ·
I'm always fascinated by how much emphasis is put on capacity, and how little emphasis is put on actually hitting your intended target with repeatable precision.

I imagine if we're one day invaded by little green aliens that are only 4" tall who are knocked over easily with a .22, capacity might prove to be beneficial:

...but otherwise I'm fine with 10 rounds in a .22 handgun. And if for some reason I wanted to tire my trigger finger out quicker I could always grab the Charger clone and install a fully loaded 25 round mag or larger capacity drum in it. I'm probably in the minority with this line of thinking, but I'm the only one that matters to me, LOL.
The Glock 44 is supposed to be a training simulacrum of the Glock 19. It fits the same holsters and has a similar feel. For the sake of training, it makes sense to have the same number of rounds as the gun you are trying to emulate. Otherwise, you stand the chance of developing training scars through repetition. If you train, train, train for 10 rounds, when you are carrying your Glock 19, you’ll have that 10th round muscle memory.
 
#18 ·
Image


I built this 15-round Glock 44 magazine based on a concept developed by Alex Alex (AA),


You get +2 rounds by removing the load assist tabs and cutting-down the follower,

Image


Here's a simple jig I made to cut the follower,

Image


You get +3 rounds by adding a Glock +2 magazine extension (SP07151). The extension must be "padded" (made more narrow) to keep the spring from twisting. In his video, AA padded the magazine extension. I opted to pad the Glock magazine extension insert (SP07165). The insert simply slips into the extension,

Image


Notice the insert must also be cut down,

Image


Note: You don't use the flat insert that comes with the OEM Glock 44 magazine.

I'm working on 3D-printing the custom insert. I may also attempt to 3D-print the cut-down follower.

I'm waiting on a $3 Chinese knock-off (AliExpress / Magorui) +2 magazine extension and insert to confirm they're compatible.

The spring must be stretched to get the slide to lock back following the last round.
That is very, very well done. Thank you for sharing!

It is too bad Glock hasn't sorted this out, and things like you working to get printed parts to keep a spring from twisting and needing to "stretch the spring" are obviously not ideal for total reliability, but you did a fantastic job with what you had to work with. Your work is really, really good. You and Alex Alex are to be commended!

Thanks for sharing!
 
#21 ·
NICE!!!!!!!

What I would really like to see is a quad stack magazine like the Kel-Tec CP33 magazines. The CP33 mags definitely work. I measured the widest part (back) of my CP33 and G44 magazines. The G44 magazine is 0.902" wide while the CP33 magazine is 0.938" wide (1/32" difference). A 20-25 round quad stack would probably fit in the stock G44 mag body.
After further review ...

This would need to use a G19 magazine. Better yet, it could use a Magpul PMAG 15 GL9 magazine which is half the cost of a G44 magazine. Both the OEM G19 magazine and the PMAG are "compatible with" (i.e., fit and lock in place) the G44. The problem is the "mouth" (not sure of the technical term) that is intended for a 9 mm round / follower. There's no way it would properly guide a .22 LR round.

I think our best bet would be a full-blown 3D-printed magazine. There are CAD files available for a G19 magazine including the follower, insert and base plate. Again, this should fit the G44. The mouth will need to be modified to match the G44 magazine. You'd need to customize the follower. And replicate the OEM G44 insert. Of course, this doesn't even address the divider.

Let's hope Glock releases higher capacity G44 magazines. ;)
 
#22 ·
Image
I'm game to give it all a try on one of my mags. I ordered the two parts and got the slider tabs off no problem.
What I'm having a bugger of a time with is getting the base off (yes, the bottom tab is pushed in and held with a punch). The plastic of the mag at the bottom is real thick and can't get it compressed in enough.
The instructions and videos do not show that process, but only a pre-prepped base that is already off about a 1/4 of the way or so.
Any tips?
Thanks!
 
#23 · (Edited)
Never mind. This did the trick. Two thin pieces of aluminum roof flashing to keep the jaws of the small welding lock pliers from marring the mag, really cranked down hard to flex the thick mag inward, base lock tab pressed in with a punch, a few taps with the nylon side of this hammer and it came off and mag is all apart. Not a scratch on anything.
Now to wait on the parts and to make the jigs and cut the follower in the mean time. Plenty of metal plates here to do it right as wickedbeernut posted. Great photos beernut!!
I should have bought two sets. I have four mags.
Image
 
#25 ·
Never mind. This did the trick. Two thin pieces of aluminum roof flashing to keep the jaws of the small welding lock pliers from marring the mag, really cranked down hard to flex the thick mag inward, base lock tab pressed in with a punch, a few taps with the nylon side of this hammer and it came off and mag is all apart. Not a scratch on anything.
Now to wait on the parts and to make the jigs and cut the follower in the mean time. Plenty of metal plates here to do it right as wickedbeernut posted. Great photos beernut!!
I should have bought two sets. I have four mags. View attachment 810866
Alternatively ... ;)

Image
 
#24 ·
And now that there will be no side tabs to assist in the loading of rounds, it might get hard getting them all in, so I modded a Glock magazine load assist from a double stack that works with the G19,17,23,22, etc.
Tapered down the thick push tab to rimfire width with a Dremel & sanding disc.
Works great on my other G44 mags. So easy to do.
Image
Image
Image
 
#27 ·
I modded a Glock magazine load assist from a double stack that works with the G19,17,23,22, etc. Works great on my other G44 mags.
This is excellent, ViperR! It is a ***** to get the last few rounds in.

Ironically, I E-mailed Maglula the other day asking if the 22UpLULA would work with a Glock 44 magazine with the load assist tabs removed. I included a picture of my "Alex Alex" Glock 44 15-round magazine. Of course, they said, "No". I don't think they even took the time to look at the picture. They are in the process of developing a magazine loader for the Glock 44, however, they (supposedly) don't have a release date. Personally, I think the "ViperR Glock 44 Magazine Loader" may be a better (certainly cheaper) option.
 
#26 ·
I should also point out 2A3D offers a 3D-printed +6 Glock 44 magazine extension that doesn't require you to cut down the follower,


You still need to stretch the OEM Glock 44 spring. Of course, the 2A3D magazine extension is longer than the Glock +2 magazine extension (SP07151) and slightly more "bulky".

The 2A3D magazine extension costs $25 (including shipping). You can message 2A3D via Facebook.

Personally, I prefer the fit and finish (and cost) of the sleeker Glock magazine extension. But the 2A3D magazine extension is an excellent option for those not wanting to cut down the follower nor modify the Glock magazine extension / insert.
 
#28 ·
Very good, but I do not wish to cut off the mags side base tabs at all. Easier to get a new follower if I want the mags to go to stock.
Not keen on the look of the +6, but these are all excellent ideas!!
I took my base off the same way you did, but I didn't have small C-clamps and used my lock pliers/alum plate combo. You really have to flex that in LOL.
Time for me to make the jigs.
Might need some measurements from you for exact length of follower cut.
 
#30 ·
I took my base off the same way you did, but I didn't have small C-clamps and used my lock pliers/alum plate combo. You really have to flex that in LOL.
You sure about that? I used the $9 Glock magazine disassembly tool pictured above. No clamps. No locking pliers. No nothing. I don't even pinch the sides of the magazine using my fingers. It's like a bottle opener.
 
#32 ·
Alright,
Did the follower mod and it turned out pretty good. Was able to get 12 in with a little extra room for full mag insertion that pushes the top round down a bit. The mag loader really helped getting all rounds in.
Now, just to wait on the base & insert and modify that.
It must have been something I saw on YouTube using a C-clamp. Sorry WBN. Now, I have to get one of those base tools you posted.
Sorry about the fuzzy pics.
Image
Image
 
#33 ·
Alright,
Did the follower mod and it turned out pretty good. Was able to get 12 in with a little extra room for full mag insertion that pushes the top round down a bit. The mag loader really helped getting all rounds in.
Looks good! And that was my experience ... the cut-down follower yields +2.

It must have been something I saw on YouTube using a C-clamp. Sorry WBN. Now, I have to get one of those base tools you posted.
Yes, a Glock magazine disassembly tool is a must-have. That's one thing I really like about the Magpul PMAG GL9 magazines. They're so much easier to open.
 
#34 ·
Thanks!
And the top round even angles up in the correct position, too.
I didn't want to snap on the OEM base on fully. Just enough to load the 12 to check.
And the slide locked open also when the mag was empty.
So, I need the bottom parts. And from your posts, I just need to cut the inset only flush to match the base. Correct?
 
#35 · (Edited)
Thanks!
And the top round even angles up in the correct position, too.
I didn't want to snap on the OEM base on fully. Just enough to load the 12 to check.
And the slide locked open also when the mag was empty.
So, I need the bottom parts. And from your posts, I just need to cut the inset only flush to match the base. Correct?
That insert was meant to slip into a Glock 19 magazine prior to sliding on the magazine extension. However, the insert won't fit into a Glock 44 magazine. The insert is too wide. You need to trim it down to the height indicated below. You can use an X-Acto knife. You then drop the insert into the magazine extension and slide them onto the magazine together. Once in position, you'll hear the spring "click" into the insert.

Again, I'm working on a 3D-printed version of the insert that is padded and the correct height. That'll eliminate all of the effort associated with this part of the conversion.

The alternative is to directly pad the magazine extension as Alex Alex did and don't bother with the insert. You'd still pad the magazine extension to the height of the red arrows as shown. Either approach will work.

I opted for the insert-based approach as I wanted it to serve as a prototype for the 3D-printed version.

Image
 
#38 ·
That insert was meant to slip into a Glock 19 magazine prior to sliding on the magazine extension. However, the insert won't fit into a Glock 44 magazine. The insert is too wide. You need to trim it down to the height indicated below. You can use an X-Acto knife. You then drop the insert into the magazine extension and slide them onto the magazine together. Once in position, you'll hear the spring "click" into the insert.

Again, I'm working on a 3D-printed version of the insert that is padded and the correct height. That'll eliminate all of the effort associated with this part of the conversion.

The alternative is to directly pad the magazine extension as Alex Alex did and don't bother with the insert. You'd still pad the magazine extension to the height of the red arrows as shown. Either approach will work.

I opted for the insert-based approach as I wanted it to serve as a prototype for the 3D-printed version.

View attachment 811468
What did you use for the side padding as far as type of plastic and what adhesive did you use?
Thanks!
 
#36 ·
I m working on a insert for the standard extension that i talk on vidéo..
More simple and reliable than hot glue.
To be continued...
And on same time i m actually printing a maxi extension like the one made by them who sold it 25$.
But for free this one...
Maybe +4/5 rounds on the extension.
 

Attachments